Welcome to SmartBlogging🌏.
Let's start the journey towards robotics by starting with simple projects by playing with Arduino inputs and outputs.
To start with we need to get any of the Entry level Arduino board. Below is the link to check with Arduino products
In this project, I'm taking Arduino uno board and below is the link to order
In order to dump code to Arduino board, a software needs to be installed and below is the link to install software IDE according to your OS
Now we are done with Arduino board and Software IDE. It's time to play with software a little and dump a simple code.
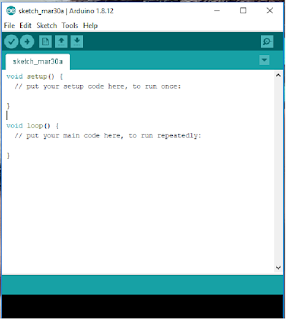
Open the Arduino IDE installed software. You will find number of examples code in File->Examples. You can open any of the example and dump the code to board and test with different inputs and observe the output.
Connect the USB to Serial cable from Arduino board to your PC or laptop as shown below.
Connect the LED's(RED->D11, YELLOW->D10, GREEN->D9) and 220 Ohm Resistors as shown below
I will just write my simple code here to control 3 LED's .**************************CODE**************************************
//Constants won't change .They are used to set pin numbers
const int LED_PINRED = 11; // number of LED pin
const int LED_PINYELLOW = 10; // number of LED pin
const int LED_PINGREEN = 19; // number of LED pin
//setup function runs once when you press reset or power the board
void setup(){
// initialize digital pin LED_PINRED,LED_PINYELLOW,LED_PINGREEN as output.
pinMode(LED_PINRED, OUTPUT);
pinMode(LED_PINYELLOW, OUTPUT);
pinMode(LED_PINGREEN, OUTPUT);
}
// the loop function runs over and over again forever
void loop() {
digitalWrite(LED_PINRED, HIGH); // turn the LED on (HIGH is the voltage level)
delay(5000); // wait for 5 second
digitalWrite(LED_PINRED, LOW); // turn the LED off by making the voltage LOW
delay(1000); // wait for a second
digitalWrite(LED_PINYELLOW, HIGH); // turn the LED on (HIGH is the voltage level)
delay(5000); // wait for 5 second
digitalWrite(LED_PINYELLOW, LOW); // turn the LED off by making the voltage LOW
delay(1000); // wait for a second
digitalWrite(LED_PINGREEN, HIGH); // turn the LED on (HIGH is the voltage level)
delay(5000); // wait for 5 second
digitalWrite(LED_PINGREEN, LOW); // turn the LED off by making the voltage LOW
delay(1000); // wait for a second}
******************************************************************************
Save the code. Select the board and port that you are using.
Now verify the code for errors and upload the code to board.
Now you can see the LED's blinking for 5 seconds one after the other continuously. This was just a introduction to start with arduino board. Will see more interesting projects further.
Facebook page : https://www.facebook.com/Blog2Vin-107230150942512/
Instagram page : https://www.instagram.com/blog2vin/
Email : blog2vin@gmail.com
Youtube : https://www.youtube.com/channel/UCpiKh6NDIjSR1ptistW9u2w
Website : https://www.blog2vin.com/


Good pair of information it helps me lot Thank you 😊
ReplyDeleteHope this was useful 👍
DeleteGood work thank you
ReplyDeleteMy pleasure👍
Delete